
This part is about how to clean cassette tapes and ready the deck before you record. In Part I and Part II we covered storage requirements and the equipment you’ll need to capture audio from analog sources. In Part III we’ll cover how to prepare that equipment to get the most quality from your tapes, and how to put it all together.
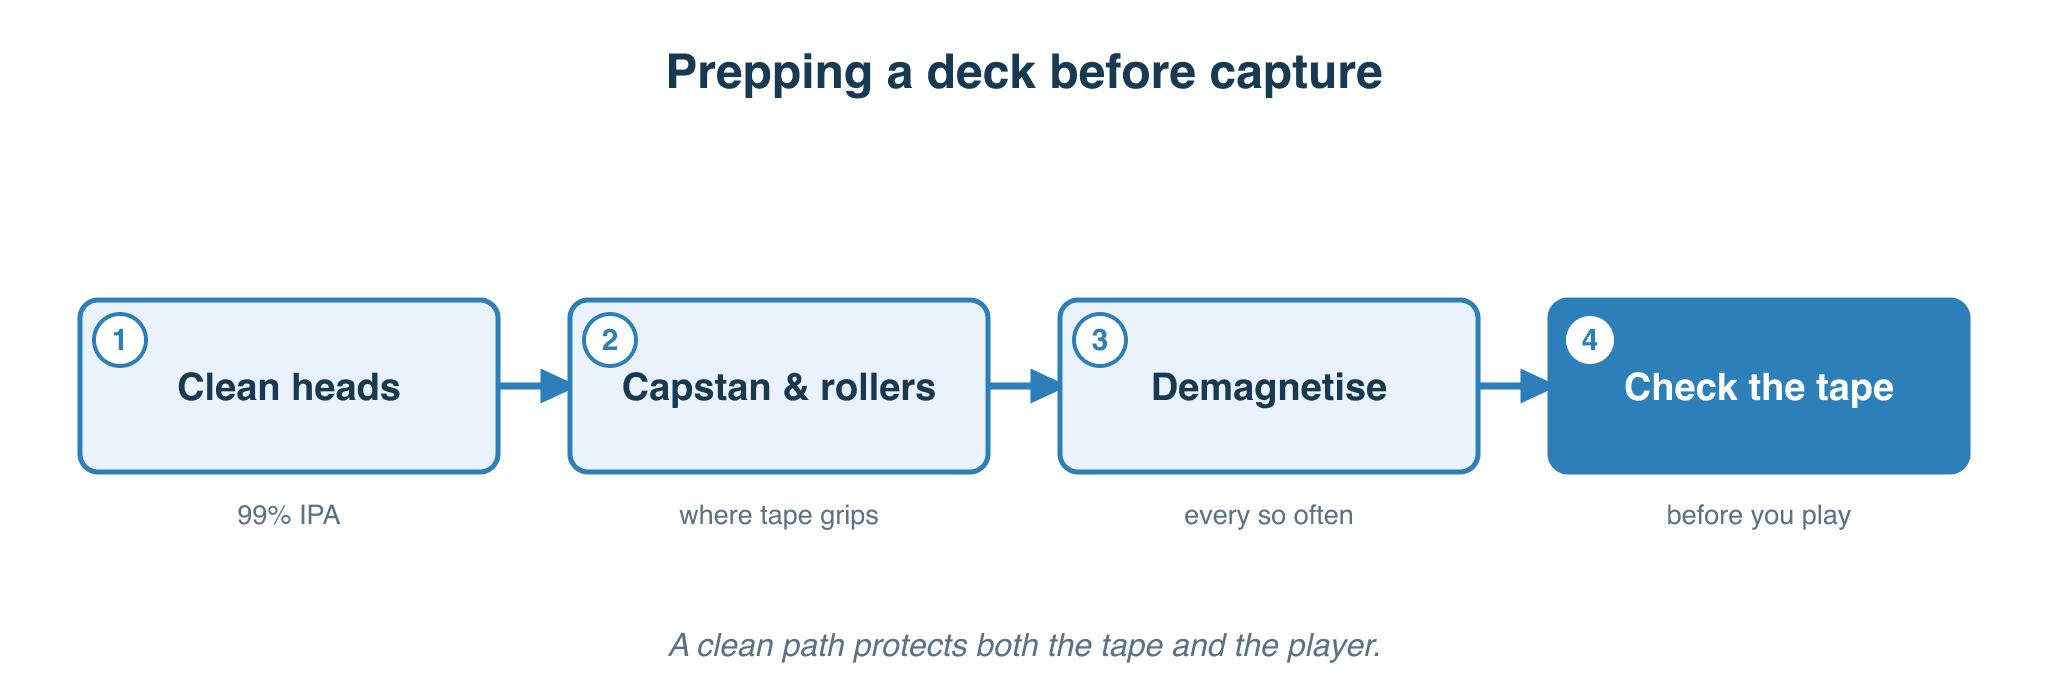
How to clean cassette tapes and get the most from your deck
- Always clean the heads with isopropyl alcohol and cotton buds — or, even better, a chamois bud — to make sure they’re physically clean.
- If you can, get hold of a head demagnetiser. Magnetised heads can muddy the sound and significantly reduce audio clarity, producing a less-than-ideal output. These are still readily available on eBay in various forms.
- Be careful cleaning the rubber capstan — clean it lightly. Over-cleaning will (especially on older decks) make it slip, and you won’t be able to use the deck until you replace or restore the roller. This happens because older rubber capstans become hard with age, and the accumulated dirt is often the only thing maintaining the consistent grip that holds tape speed steady. Listening to music with a slipping head is truly awful.
How to maximise the audio quality from your tapes
If a tape has mould on it, not only will it dirty your nice clean heads, it’ll also affect the sound — particularly clarity. It’s strongly recommended to give these tapes a general clean before recording.
Tape mould and other issues
Depending on your situation, your tapes may have various issues — mould, sticky-shed syndrome, etched plastic housing that causes tape breakage, and so on. For cassette tapes you’ll typically fall into the category of clean tapes or mouldy tapes. Sticky-shed has been more common on reel-to-reel than on cassette, but as the years go by the various tape formulas show different signs of age. The good news is that the problem can usually be temporarily fixed in order to digitise the tape (see Tip 3 below).
General clean
The first step is a general external inspection of the tape. If there’s white dust, or anything worse, you’ll need to disassemble the cassette and clean it. Cassette cleaning devices are basically impossible to find these days, so the only option for most people is to disassemble the tape and clean it by hand.
For this you’ll need:
- Cotton buds, chamois swabs, or microfibre cloth
- Isopropyl alcohol
- Screwdriver — preferably Phillips
- Can of compressed air
- Spare tape player
- Optional: blank cassette tapes that can be unscrewed
The process has multiple steps:
- Rewind the tape in the donor player.
- Remove the cassette and disassemble the case. If the case can’t be unscrewed and has to be forced open, find a new blank cassette tape that can be unscrewed and transfer the magnetic tape into it. If possible, transfer the tape onto the new spools as well. These are still available online in various forms.
- With the cassette still open, blow away the loose mould with the can of compressed air (do this outside, or somewhere that can be cleaned afterwards).
- Completely remove the tape spools from the cassette, holding on to the plastic covering protectors on either side. This helps prevent the tape unravelling.
- Clean the inside of the case with isopropyl on a microfibre cloth. Also clean any spooling rollers, both sides of the plastic covering protectors, and so on. It’s also a good idea to clean the leader path (first few cm of the tape roll) manually, as it can’t be cleaned by the remaining steps.
- Reassemble the case.
- Insert the tape into the spare cassette player with the front casing removed so you have direct access to the tape path.
- Fold a thin layer of microfibre cloth over a cotton bud and drop a decent amount of isopropyl alcohol onto the end. If this is too big, just use a chamois swab (hard to get) or a plain cotton bud.
- Press the isopropyl-covered cloth, swab or bud onto the outside-facing part of the magnetic tape.
- Fast-forward the tape while holding the swab against it, until the end of the tape is reached. If you need to add more isopropyl as you go, you can stop part-way and re-apply (or come up with your own variant).
- Once at the end of the tape, remove and disassemble again.
- From here, repeat from step 3 — except this time using rewind instead of fast-forward.
- Open the cassette one last time and do step 3 again.
- Done.
Once that’s done, you’ll have a clean deck to play your tapes in and mould-free tapes to give you the best audio quality possible.
What’s next
In Part IV we’ll cover physically connecting the deck (or USB walkman) to your computer or audio interface, ready for capture.
")


")
")
")